


The 2DG fault indicator (hereinafter referred to as the indicator) is a newly developed high-tech product suitable for detecting and indicating cable short-circuit faults in cable junction boxes, ring network switchgear, etc. The indicator incorporates an advanced microchip, offering advantages such as intelligence and low power consumption. The indicator surface features one switch and two indicator lights; the middle one is a photosensitive switch. A green light indicates normal operation, and a red light indicates a fault. The indicator light illuminates each time the photosensitive switch contacts (from unlit to lit state). When the circuit is in a normal state, the indicator performs a self-test, and the green light flashes for approximately 30 seconds before automatically stopping. When a short-circuit fault occurs, the indicator detects the short-circuit current, performs calculations, and memorizes the fault status. Within the automatic reset time, the red light flashes for approximately 3 minutes before automatically stopping. Outside the automatic reset time, the indicator automatically resets, clearing the fault record.
◆Short-circuit operating current: ≥800A (error ±10, adjustable according to requirements)
◆Short-circuit response time: 0.02≤T≤4S
◆Operating environment range: -40℃ to +85°C
◆Power supply: Built-in 2000mAh lithium battery, lifespan 8-10 years, voltage 3V
◆Automatic reset time: 12 hours (optional, can be determined by the user when ordering)
◆ Cable clamping range: Cable diameter (including sheath) ≤ Ф35mm
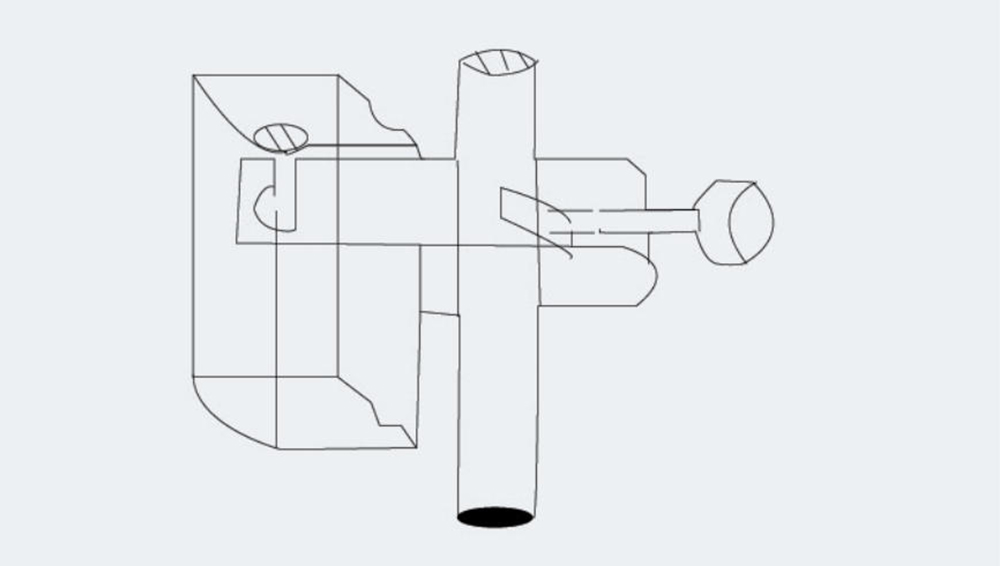
Before installation, please confirm that the indicator is working properly: Before use, remove the black tape from the indicator's photosensitive switch and expose it to light. The green light should flash for approximately 3 seconds and then stop, indicating normal operation. When the indicator is not in use and needs to be removed, please cover the photosensitive switch with the black tape before storage. Remove the "U" shaped clamp from the indicator, place the indicator on the cable, ensuring the "V" groove of the indicator engages with the cable, with the panel with the indicator light facing the most easily observable direction. Place the "U" shaped clamp back into the indicator; the cable should now be inside the "U" shaped clamp. Tighten the bolts on the "U" shaped clamp until the indicator cannot slip off the cable.
Photosensitive switch triggering: The user presses their hand against the photosensitive switch hole and then exposes it to light to trigger it. When the light is very weak (such as at night or in a culvert), it is best to bring a flashlight to shine on the photosensitive switch to increase the light intensity. Otherwise, the photosensitive switch may not be triggered.

ZW7-40.5户外高压真空断路器ZW7-40.5户外高压真空断路器ZW7-40.5户外高压真空断路器ZW7-40.5户外高压真空断路器

ZW8- 12户外高压真空断路器ZW8- 12户外高压真空断路器ZW8- 12户外高压真空断路器ZW8- 12户外高压真空断路器

ZW10-12户外交流高压真空断路器ZW10-12户外交流高压真空断路器ZW10-12户外交流高压真空断路器ZW10-12户外交流高压真空断路器

ZW20-12F户外柱上高压智能真空断路器ZW20-12F户外柱上高压智能真空断路器ZW20-12F户外柱上高压智能真空断路器ZW20-12F户外柱上高压智能真空断路器

ZW32-12户外高压真空断路器ZW32-12户外高压真空断路器ZW32-12户外高压真空断路器ZW32-12户外高压真空断路器

ZW32-12F户外交流高压真空分界断路器ZW32-12F户外交流高压真空分界断路器ZW32-12F户外交流高压真空分界断路器ZW32-12F户外交流高压真空分界断路器

WLS-10-1.1-1.4WLS-10-1.1-1.4WLS-10-1.1-1.4WLS-10-1.1-1.4

WLS-35户外三芯WLS-35户外三芯WLS-35户外三芯WLS-35户外三芯

WLS户外单芯WLS户外单芯WLS户外单芯WLS户外单芯

WLS户内外冷缩三芯WLS户内外冷缩三芯WLS户内外冷缩三芯WLS户内外冷缩三芯

NLS-35户内冷缩三芯NLS-35户内冷缩三芯NLS-35户内冷缩三芯NLS-35户内冷缩三芯

NLS-35户内单芯NLS-35户内单芯NLS-35户内单芯NLS-35户内单芯
Address:No.1, Lituo New Building, Keaisi Road, Xiangyang Industrial Zone, Liushi Town, Yueqing City, Zhejiang Province, China
Phone:+86 0577-62861931
Fax:0577-61778390

Follow official account